How to Create a Multi-Node K8S cluster on AWS Cloud
While working as vRAN System Engineer interacting with public and private cloud with cloud native applications, in most of the cases, We did not get chance to make my hand dirty with building cloud network from zero, We have been given a ready made k8s Cluster prepared by Cloud/Platform Team and been asked deploy our Cloud Native application.
As a result, being the user of k8s don’t get detailed understanding about configuration of the Master Node, underlying k8s services, Container run time (CRT) so on and so forth.
This blog post, we will try to consolidate detailed information about internal architecture of k8s and many more interesting concept like Node selector, Node Affinity, Taint etc. with practical approach.
After reading this post you will have following learnings.
- Unboxing the Kubernetes and understand the different component of k8s
- How to launch instance on AWS cloud
- Launch the K8s cluster on top of AWS cloud
Here, I am going to launch One Master and One Worker node on AWS Public Cloud Platform. Let’s begin.
I launched two instances/VM/Server with following details:
- Operating system: Amazon Linux 2 AMI (HVM) – Kernel 5.10
- Capacity: 1 GB RAM, 1CPU & 8GB SSD
- Region: US EAST (N.Virginia)
although for Master Node, it is recommended to use 2CPU & 2GB RAM but I will show how to tackle this compute error.


- I used Putty for remote login to these instances using public IP & Private key.

- In Master node, login with root account and install the docker container engine using yum and start the docker service permantely using systemctl enable docker –now.
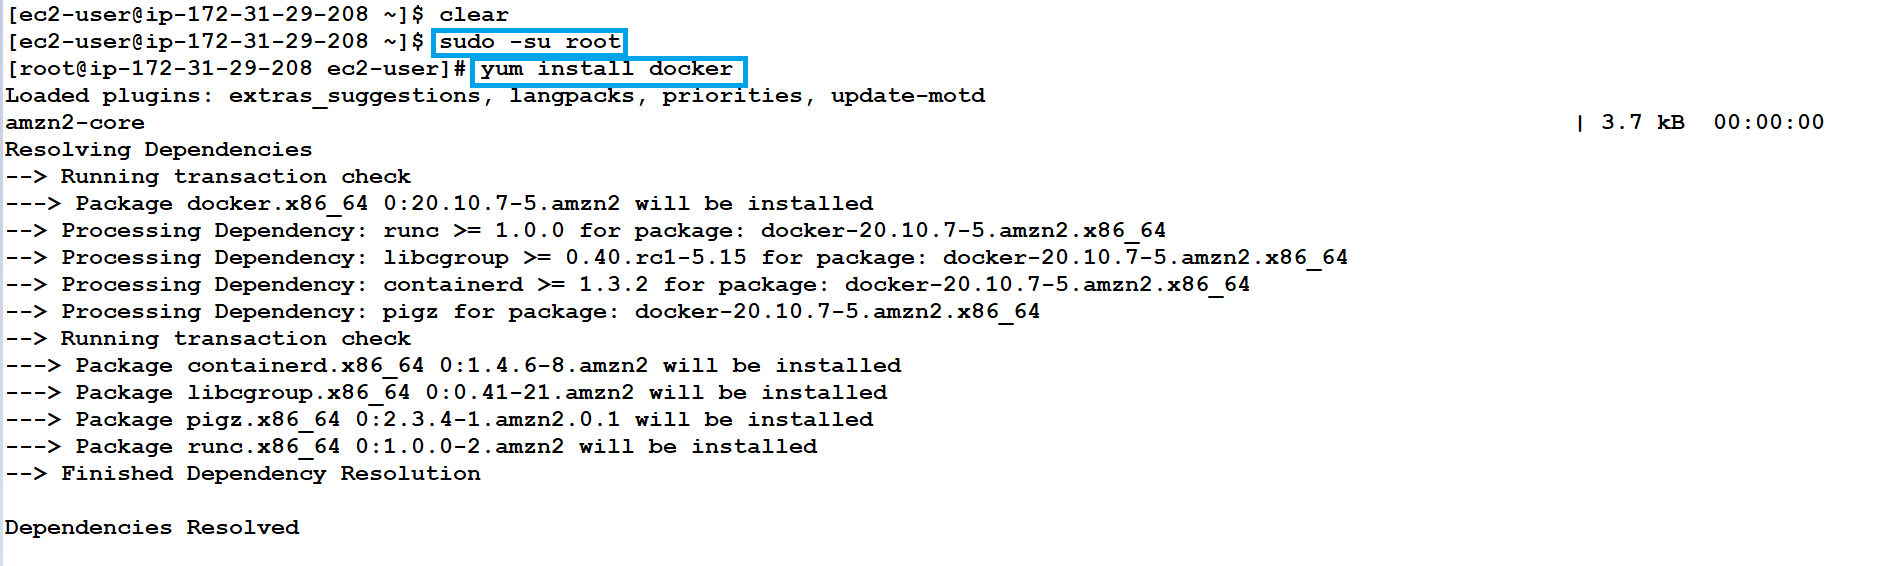

- I am going to use kubeadm, a tool built to provide kubeadm init and kubeadm join as best-practice “fast-path”for creating kuberenetes clusters. To install kubeadm first yum need to be configure for same as depicted below.
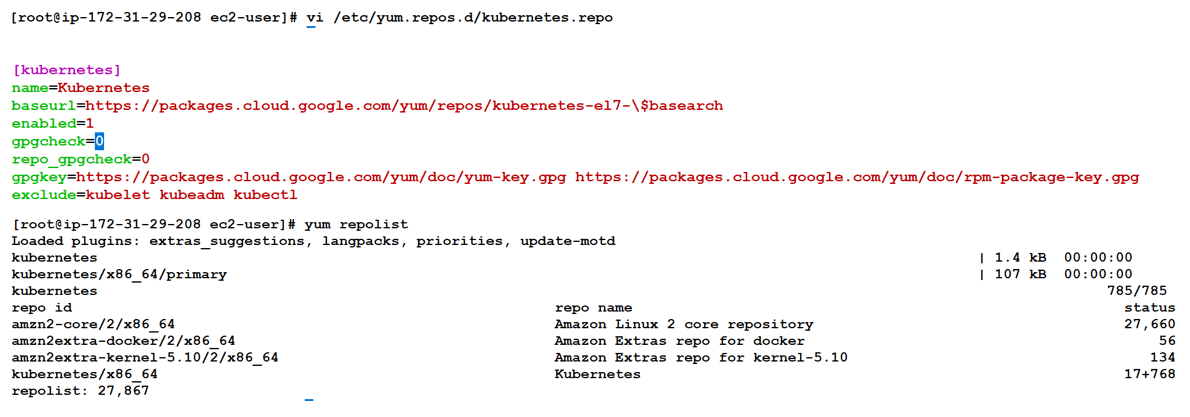
- Once yum repolist is configured now yum know from where to download kubeadm. Kubectl & kubelet downloaded as dependencies
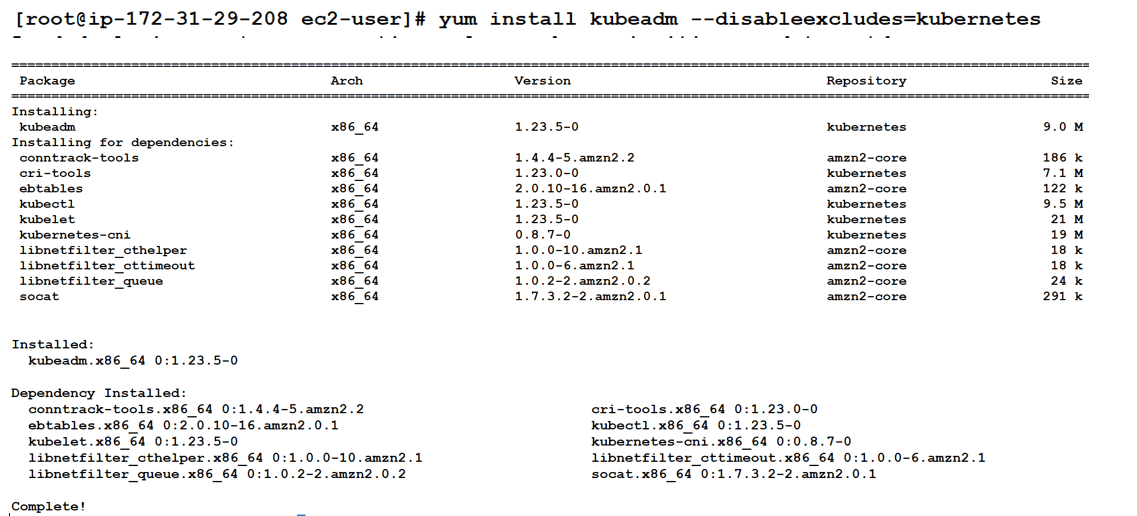
- As kubelet downloaded as dependencies let’s start the kubelet services inside the master node kubelet servieces is activating but still not active.

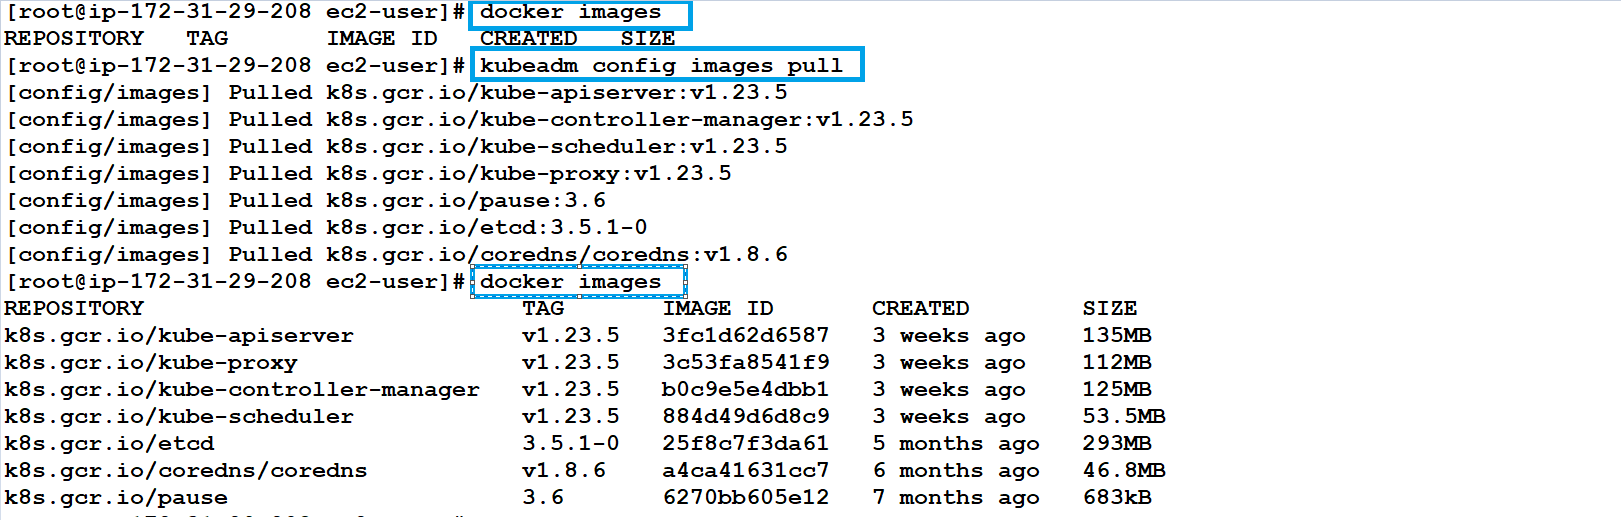
- kubeadm config images pull command help us to pull the docker images for kube-apiserver, kubecontroller-manger, kube scheduler, etcd, coredns etc from google hub which is same as docker hub.
 kubeadm init command used to intialize the master node , with the help of argument –pod-network-cidr. POD can be launched with desired IP/subnet. After running kubeadm init command in pre-flight check some error & warning populate let’s try to resolve all errors. K8s need iproute-tc for internal networking let’s install the iproute-tc command using yum.
 kubeadm init command used to intialize the master node , with the help of argument –pod-network-cidr. POD can be launched with desired IP/subnet. After running kubeadm init command in pre-flight check some error & warning populate let’s try to resolve all errors. K8s need iproute-tc for internal networking let’s install the iproute-tc command using yum.
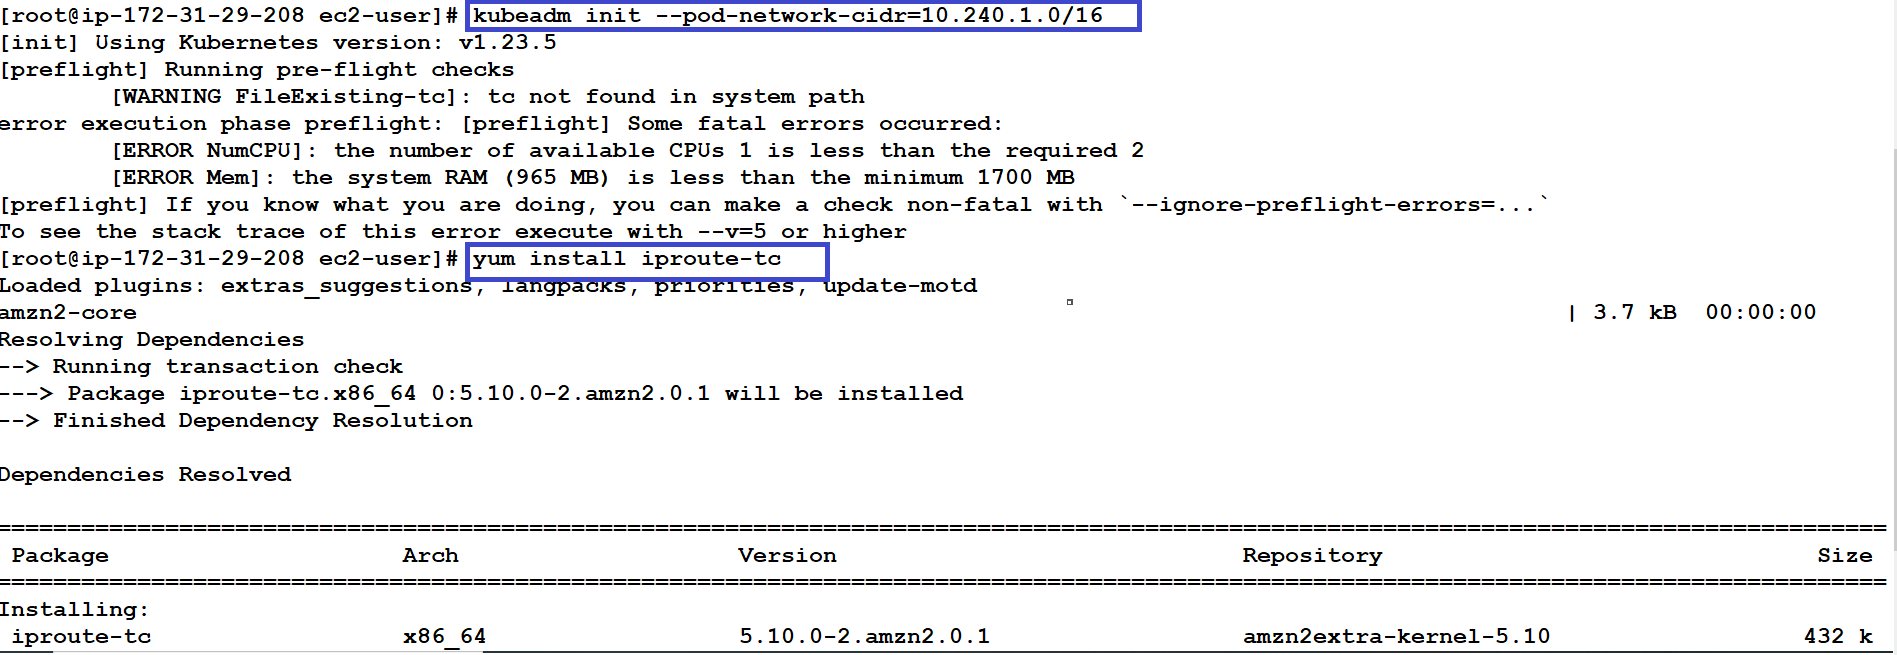
- Docker by default driver is cgroupfs but Kubernetes did’t support cgroupfs driver so to change the driver to systemd some changes is required in docker internal (daemon.json) file as mentioned below:-

- As for Master node recommendation is to use 2GB/RAM and 2/CPU but our instance or master node running on 1GB/RAM and 1CPU so during pre-flight I am ignoring the preflight error of RAM and CPU
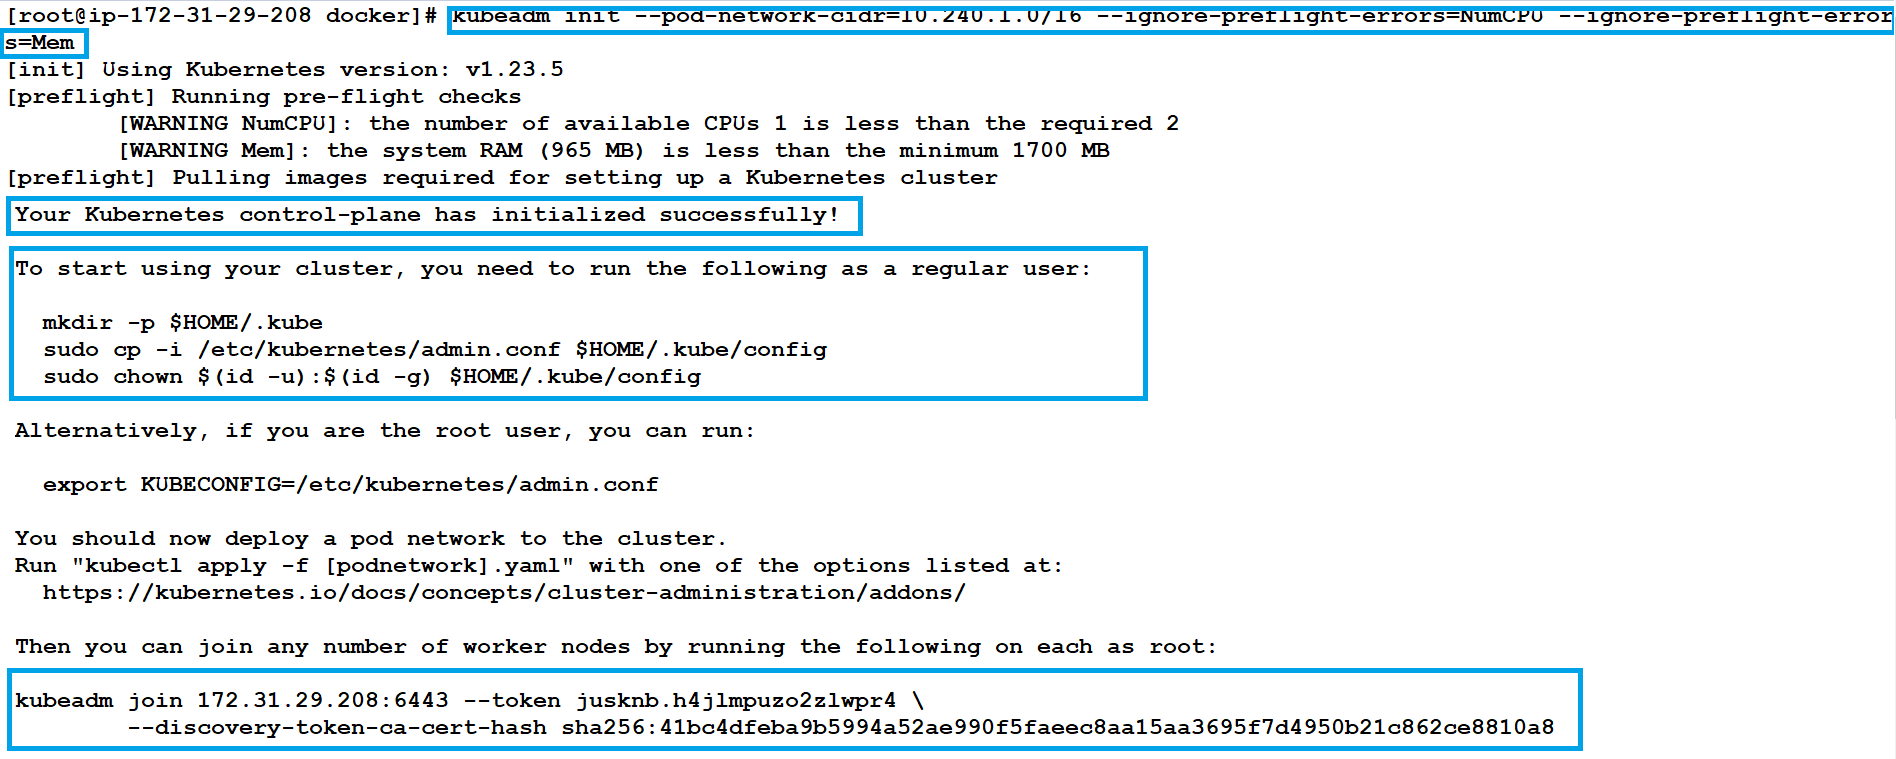
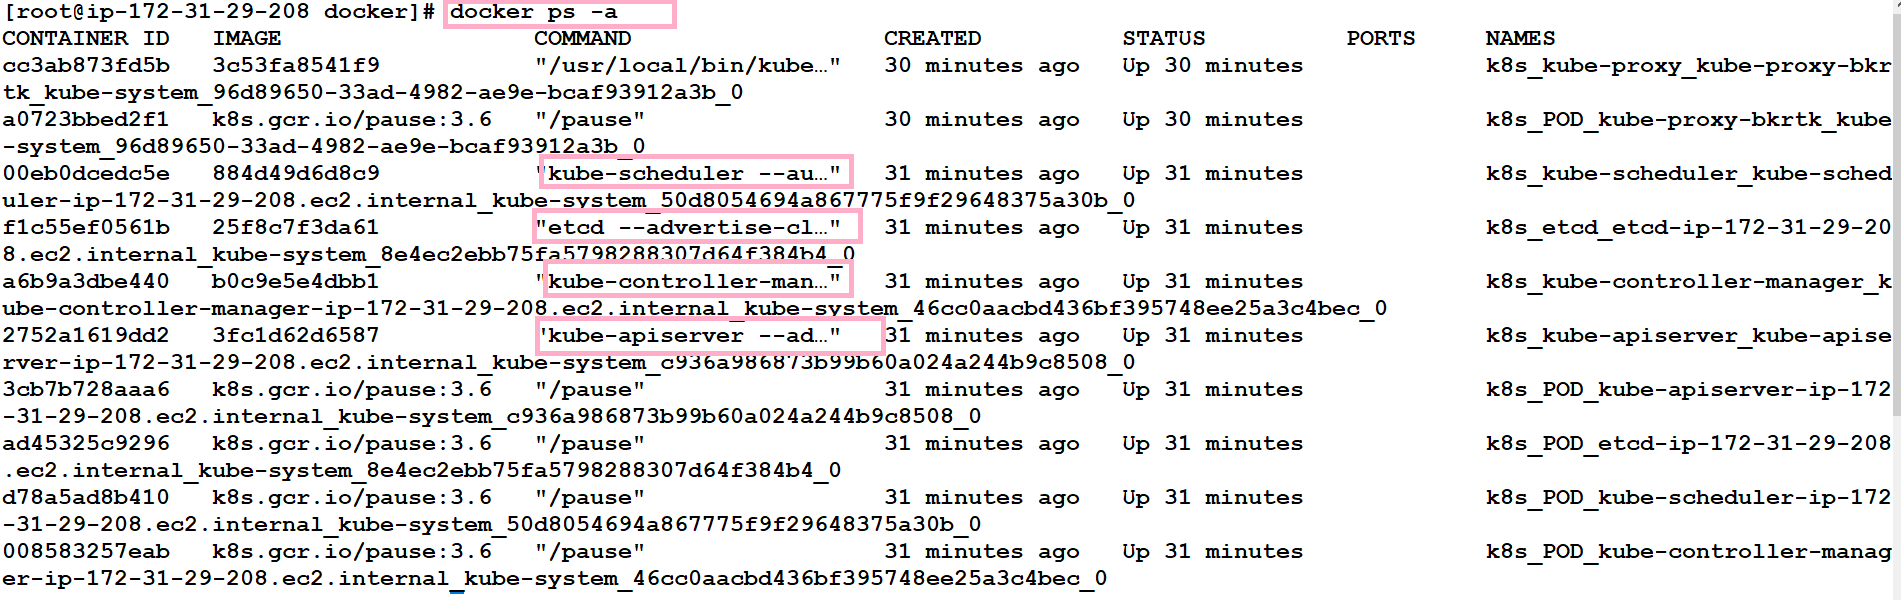
- After successfully executing the kube init command master node is initialized and all the internal component of kubernetes like API-server, kube-scheduler, etcd, kube-controller manager deployed as container.
- To configure the master node as user or simply to run the kubectl command inside the master kubectl should know the IP where master is running plus kubectl have to prove authentication to master so below command will help to configure the master node as client also. So master node is configure successfully but still node is not in active state

- Now same step can be followed for worker node configuration
-
- Install the container run time (docker), Install the Kubeadm after configuring the yum
- Install the kubeamd, kubelet and start the services of kubelet using systemctl command
- Install the iproute-tc inside the worker node and change the docker driver from cgoupfs to systemd
- As a requirement for Linux node’s iptable to correctly see bridged traffic, net.bridge-nf-call-iptales is set to 1 in sysctl config file
-

- Now question is how my worker node know the IP-address , username and Token to join to the master node. So from master node kubeadm token create –print-join-command provide the token & IP which is used by worker node to join the master node. Once we run kubeadm join command with (credentials generated from master node) inside the worker node IP (172.31.17.170) worker node joined with master node.

- Now worker node successfully joined with Master node we can check this with kubectl get nodes command but both the node are not in ready state

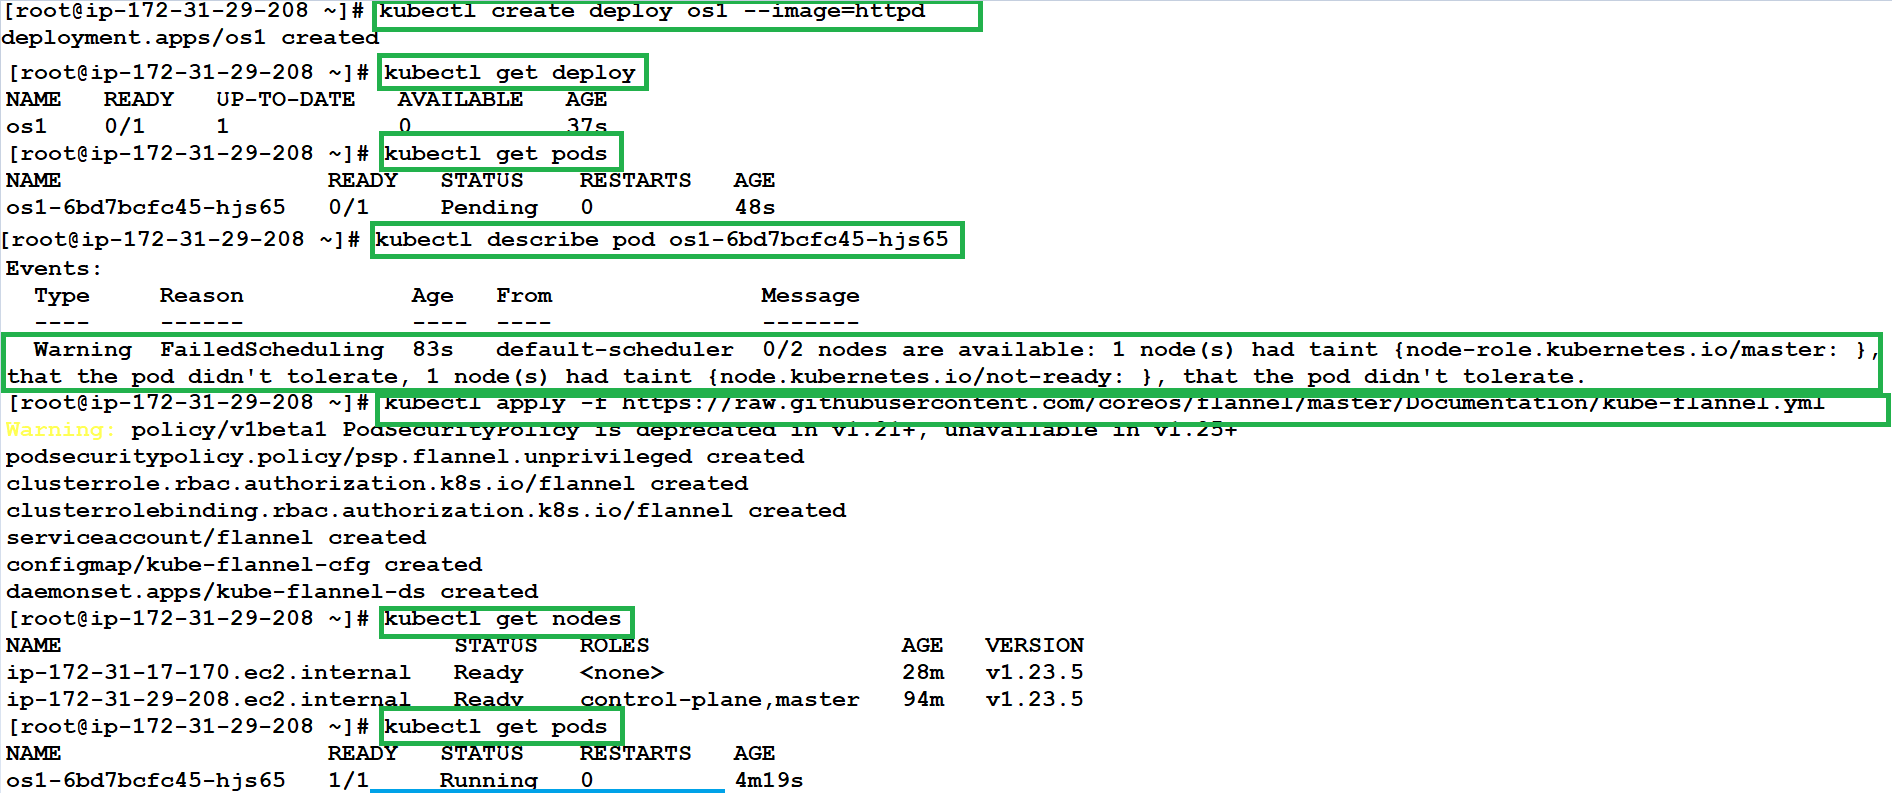
- Now I tried to launch tpod os1 using deployment but pod status is pending once we describe the pod inside event s it clearly mention kube-scheduler trying to launch the pod but worker node note in ready state.
- A CNI plugin is required which is responsible for inserting a network interface into the container network namespace (e.g., one end of a virtual ethernet (veth) pair) and making any necessary changes on the host (e.g., attaching the other end of the veth into a bridge). It then assigns an IP address to the interface and sets up the routes consistent with the IP Address Management section by invoking the appropriate IP Address Management (IPAM) plugin. I selected Flannel CNI for this demo. After Flannel plugin both the node are in Ready state and os1 pod start running inside the worker node.

Article is submitted by Deepak Sharma